

Setup - GraphQL
💃 What's Skeet? 🕺
⚡️ Do more, manage less ⚡️
Reduce app development and operation costs and realize more plans.
Skeet is an open-source full-stack app development solution.
You can start writing app logic immediately without worrying about infrastructure.
📱 Demo App made by Skeet: https://skeeter.dev/

🧪 Dependency 🧪
- TypeScript ^5.0.0
- Node.js ^18.17.1
- Yarn ^1.22.19
- Google Cloud SDK ^430.0.0
- Firebase CLI ^12.0.0
- GitHub CLI ^2.29.0
- Java
※ We don't write Java but we need it for mobile apps working
📗 Usage 📗
① Install Skeet/Firebase CLI
Skeet CLI is a command line tool for efficiently using the Skeet framework. You can install it with the following command. If npm is already installed, you can install it with the following command.
$ npm i -g @skeet-framework/cli $ npm install -g firebase-tools
If npm is not installed, you can install it with the following command. (This command installs nodenv, node, npm, @skeet-framework/cli and edits .profile/.zshrc.)
$ sh -c "$(curl -sSfL https://storage.googleapis.com/skeet-assets/resources/v1.0.2-install)" $ npm install -g firebase-tools
② Create Skeet App
$ skeet create <appName>
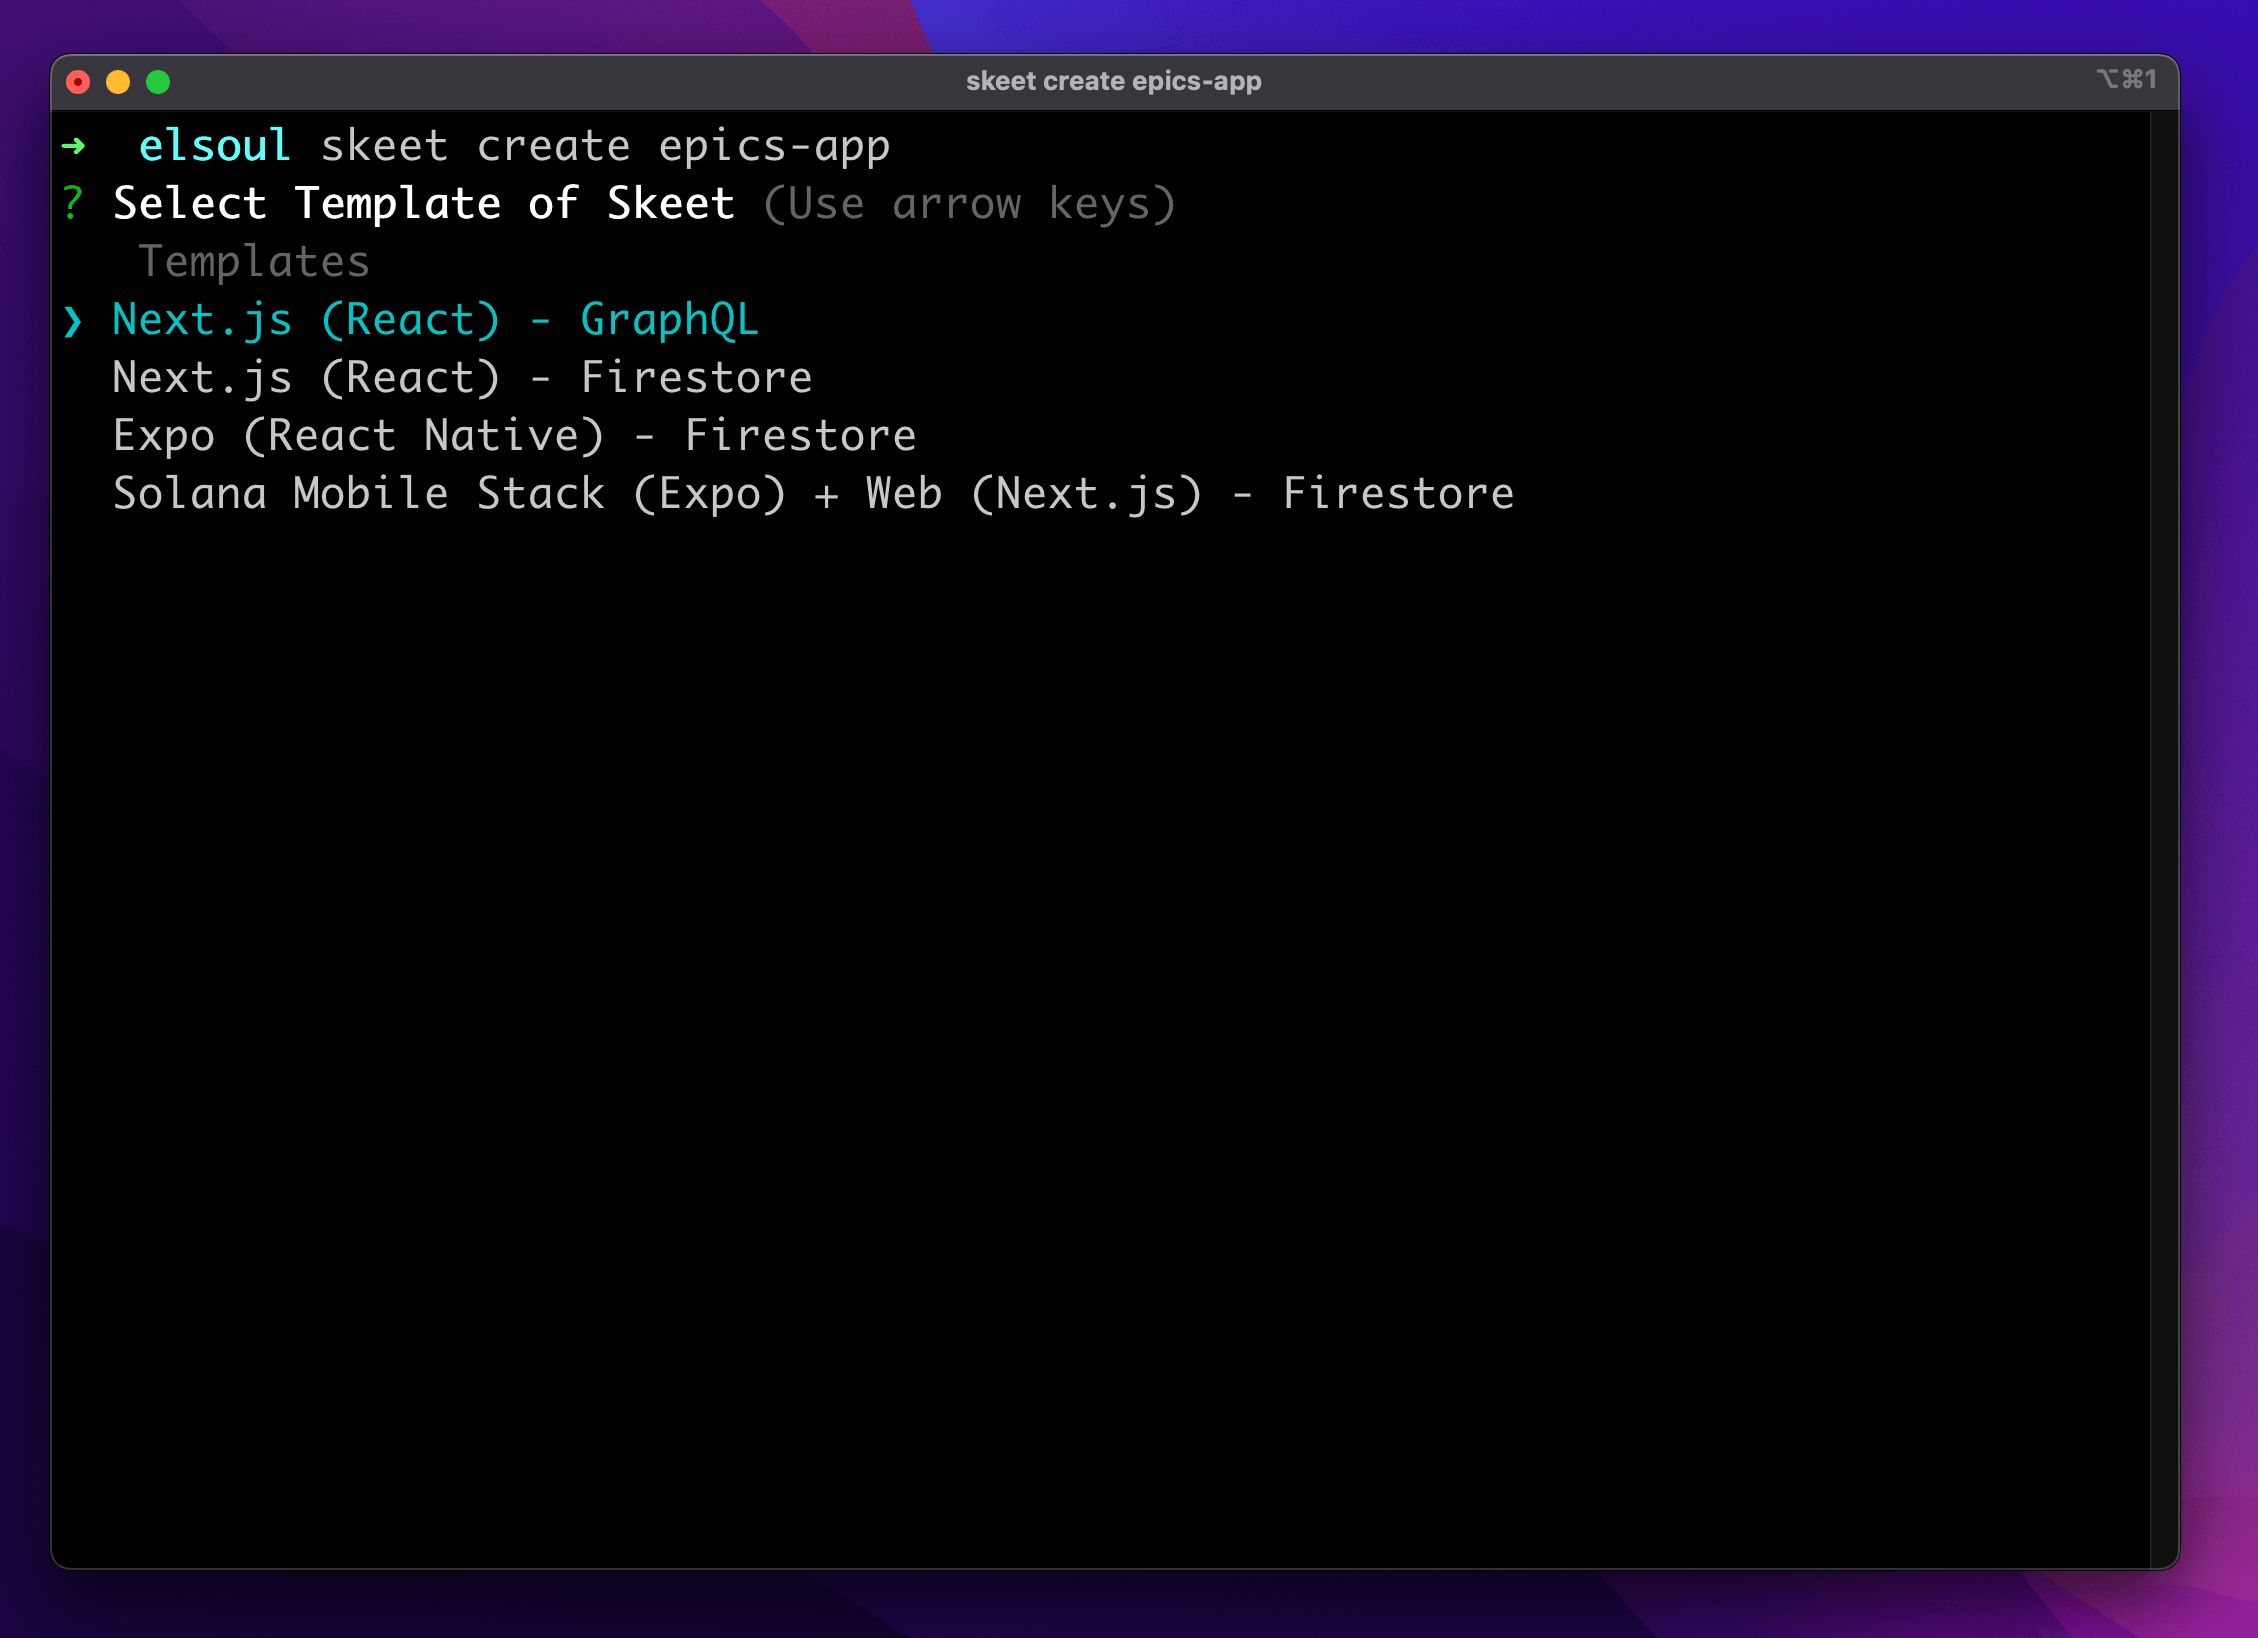
You can choose a template for the frontend.
※ This tutorial uses the Expo version, but you can use the same procedure even using the Next.js version.
③ Run Skeet App
$ cd <appName> $ skeet s
Now you have both frontend and backend running locally ⭐️
📲 Frontend(Next.js) - http://localhost:4200/
📲 Frontend(Expo) - http://localhost:19006/
💻 Firebase Emulator - http://localhost:4000/
⚠️ You need to finish Activate Skeet ChatApp step to fully use default Skeet App ⚠️
🤖 Activate Skeet ChatApp 🤖
① Create Googel Cloud Project
Create Google Cloud Project
② Add Firebase Project
Add Firebase Project
③ Activate Firebase Build
- Activate Firebase Authentication
-
Activate Firebase Authentication

-
Activate Email/Password Sign-in

- Activate Firebase Firestore
-
Activate Firestore

-
Select Native Mode

-
Select Region

- Firebase Storage
-
Activate Firebase Storage

-
Select Native Mode

-
Select Region

④ Skeet init to setup project
Run skeet init command and select your GCP Project ID and Regions to setup.
Then, please visit the URL to authenticate your Firebase account.
// Please login to Google Cloud if you have not $ gcloud auth login $ skeet init --login ? What's your GCP Project ID skeet-demo ? Select Regions to deploy europe-west1 europe-west2 europe-west3 ❯ europe-west6 northamerica-northeast1 southamerica-east1 us-central1 Visit this URL on this device to log in: https://accounts.google.com/o/oauth2/auth?project... Waiting for authentication...
⑤ How to setup Secret Key
- Upgrade to Firebase Blaze Plan
Skeet Framework uses Cloud Secret Manager environment variables to manage sensitive information such as API keys.
This command requires a Firebase Blaze or higher plan.

From the Firebase console's bottom left menu, select Upgrade.
- Cloud Usage of Skeet Framework
Skeet Framework requires a Firebase Blaze plan or higher.
Google Cloud Free Program should cover the usage fee for the development environment.
The Google Cloud Free Tier has two parts:
- A 90-day free trial with a $300 credit to use with any Google Cloud services.
- Always Free, which provides limited access to many common Google Cloud resources, free of charge.
Free cloud features and trial offer
⚠️ We also recommend setting things like budget alerts to avoid unexpected charges. ⚠️
- Set Secret Key in Cloud Secret Manager
using the skeet add secret <secretKey> command
Set the OpenAI Organization ID as an environment variable.
$ skeet add secret CHAT_GPT_ORG ? Enter value for CHAT_GPT_ORG: <yourOpenAIOrganizationID>
Set CHAT_GPT_KEY as well.
$ skeet add secret CHAT_GPT_KEY ? Enter value for CHAT_GPT_KEY: <yourOpenAIKey>
You can also write it in functions/skeet/.secret.local or functions/skeet/.env to try it easily, This method does not translate to production environments.
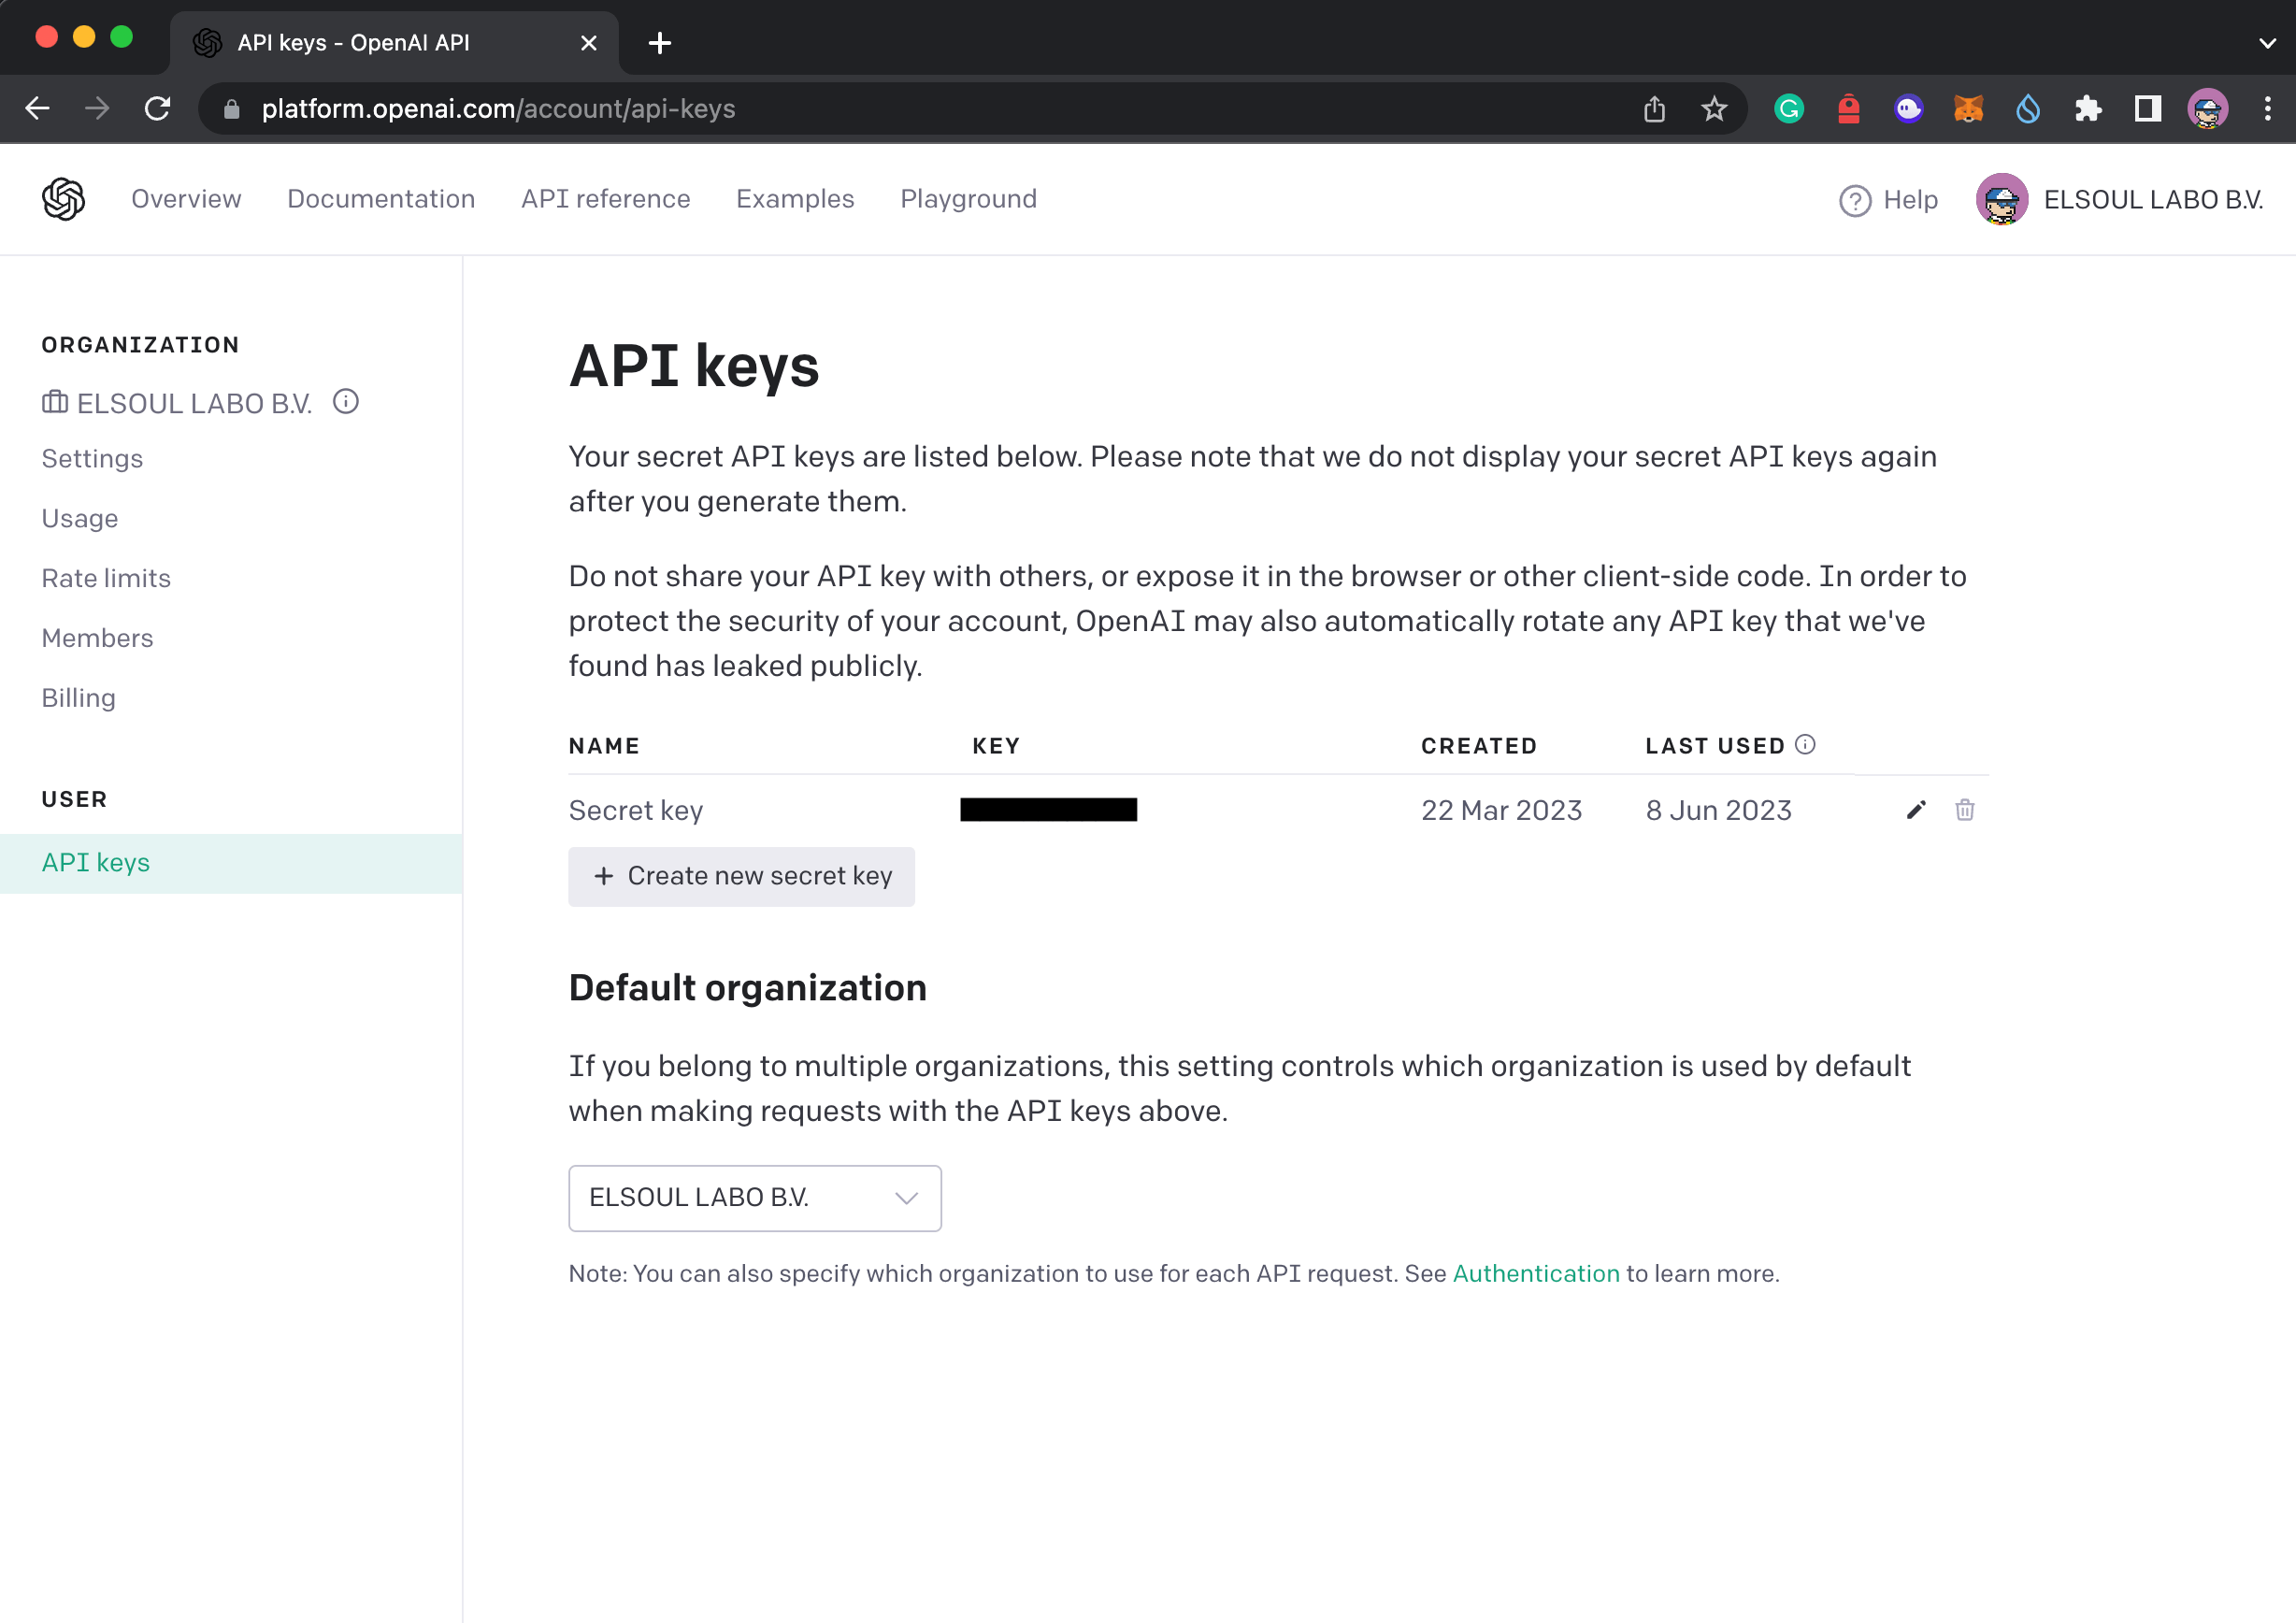
- Create OpenAI API Key
Now you are ready to use Skeet ChatApp 🎉
📱 User Login Auth 📱
$ skeet s
Run Skeet App locally and access to
http://localhost:19006/register (with Next.js: http://localhost:4200/auth/register)
Let's create a new user account with your email address and password.

After registration, you will see the console log like below.

Click the link in the console log to verify your email address.
To verify the email address [email protected], follow this link: <Link>
Successfully verified your email address.

✉️ Create AI Chat Room ✉️
After login, access this page to create a chat room.
http://localhost:19006/user/open-ai-chat (with Next.js: http://localhost:4200/user/chat)
Let's create a chat room with the following settings.
OpenAI Chat Room Settings
| item | description | type |
|---|---|---|
| Model | Select OpenAI API's Model | gpt-3.5-turbo / gpt-4 |
| Max Tokens | Set OpenAI API's Max Tokens | number |
| Temperature | Set OpenAI API's Temperature | number |
| System Charactor | Set OpenAI API's System Charactor | string |

Now you are all set 🎉
